Choosing an air filter for a generator seems simple until the engine begins running hot, losing power, or collecting fine dust. Many owners ask, “what size air filter do i need for my generator?” The honest answer depends on more than length and width. Engine model, housing design, airflow direction, filter thickness, and the manufacturer’s specifications all matter.
Generator service specialist Richard K. Davis explains, “A filter must fit the housing and protect airflow, not merely match one dimension.” That principle is easy to overlook. A filter can slide into place and still leave a narrow gap around its frame. Dust may enter through that gap. A filter that is too thick can also restrict intake airflow, especially when the pleats become dirty.
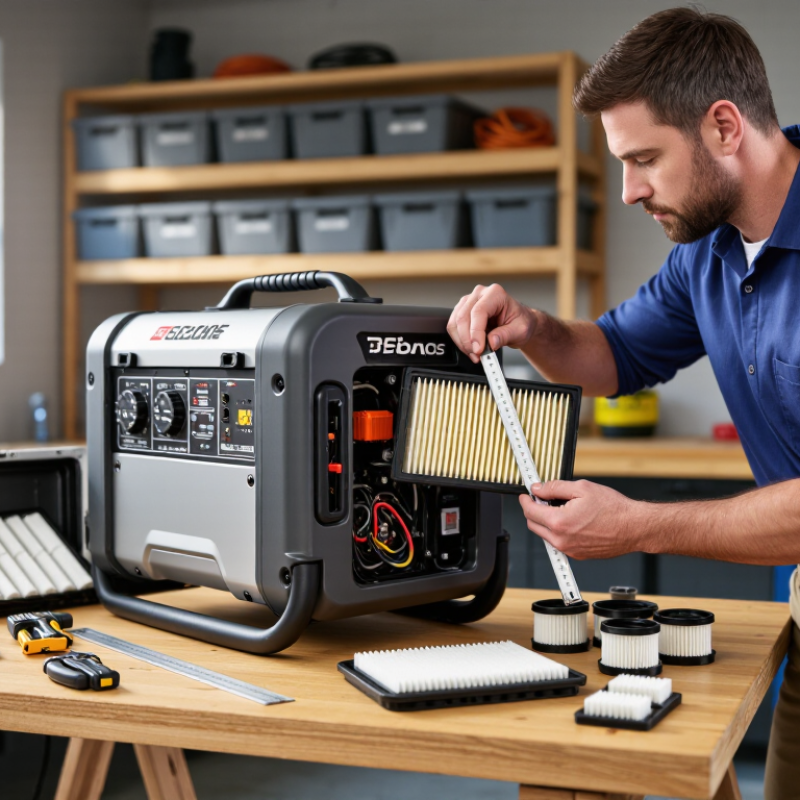
This guide explains how to identify the correct filter size with practical checks. You will learn how to read the generator model plate, inspect the old filter, and measure the housing accurately. Use a steel ruler, not a flexible tape. Record length, width, thickness, seal shape, and airflow markings. Then compare those measurements with the owner’s manual or an authorized parts catalog.
Small details matter. A warped rubber seal can cause trouble. So can a forgotten foam pre-filter. Measure twice.
There is also room for doubt. The old filter may be incorrect, damaged, or an aftermarket substitute. Treat it as evidence, not proof. The safest choice combines accurate measurements, verified part numbers, and the generator manufacturer’s airflow requirements. That approach supports reliable starting, cleaner combustion, and longer engine life.
Identify Your Generator’s Air Filter Requirements
How to Choose the Right Air Filter Size for Your Generator?
Identify your generator’s air filter requirements before buying a replacement. Check the owner’s manual, service label, or maintenance record for the exact filter number. If those details are missing, record the filter’s length, width, height, opening shape, and sealing edge. A filter that looks similar may still restrict airflow or allow dust into the engine.
Measure carefully.
In field servicing, technicians often compare the old filter with the housing, not only with online dimensions. Inspect the housing for cracks, bent clips, or a flattened gasket. These faults can cause leaks, even with the correct filter. Confirm whether your generator uses a foam, paper, or dual-layer filter. Operating conditions matter too. Dusty work areas may require more frequent inspection than clean residential storage. I have seen maintenance decisions rely too heavily on appearance, which is not always reliable.
Tips: Keep the generator switched off and cool before removing the filter. Photograph the installed position before taking it out. Write down the engine model and filter measurements together. Never force a filter into place. The cover should close evenly, without pressure or gaps. If the manual and measured dimensions disagree, pause and verify the requirements with a qualified service professional. Small discrepancies can signal an incorrect part or a damaged housing.
Measure the Existing Filter and Housing Correctly
How to Choose the Right Air Filter Size for Your Generator?
Measure the Existing Filter and Housing Correctly
Turn the generator off and let the engine cool before opening the filter housing. Remove the existing filter gently, without shaking dust into the intake. Record its length, width, and height with a rigid tape measure or caliper. Measure the filter body, not the flexible sealing edge. Write each dimension down immediately. Small errors can cause large problems.
Check the filter’s shape and sealing surface closely. Is it rectangular, cylindrical, pleated, or foam-based? Measure the gasket thickness and note whether it sits on the top, side, or end. A filter that looks correct may still leak around a poorly matched seal. Dust trails inside the housing often reveal this issue. Do not depend only on printed numbers, because replacement sizes can vary between suppliers.
Measure the housing’s internal length, width, and depth as well. Leave enough room for the filter to slide into place without crushing its pleats. Check clips, ribs, hinges, and intake openings for interference. The airflow arrow should point toward the engine. It sounds obvious, yet installation mistakes happen during hurried maintenance. A slightly loose filter is not “close enough.” It can allow unfiltered air into the engine and shorten component life. Recheck your notes against the equipment manual when available. If the old filter is distorted, measure the housing instead, then inspect the fit after installation. Perfect measurement is difficult in a dusty compartment, so photograph the arrangement before removing anything.
Match Filter Dimensions, Type, and Filtration Rating
Choosing the right air filter starts with accurate dimensions, not guesswork. Measure the old filter’s length, width, and height after removing it. Check the frame, sealing edge, and mounting clips as well. Measure twice.
Nominal dimensions can differ from actual measurements. A filter that looks close may leave a narrow dust path. That gap can carry grit into the engine. In practical maintenance work, technicians often inspect the gasket for flattened corners, cracks, or shiny compression marks. These details show whether the filter has sealed properly. Fit matters.
Next, match the filter type to the generator’s operating environment. Pleated paper filters suit many standard applications, while foam elements may support dusty outdoor conditions when the engine design allows them. Never replace one type without checking the generator manual. Filtration rating matters too. A higher rating is not automatically better. Excessive restriction can reduce airflow, increase fuel use, and raise engine temperature. A low-quality filter may pass fine dust despite impressive numbers.
Use the engine manufacturer’s specified rating whenever available. If the generator runs near gravel, farmland, or construction dust, inspect the element more frequently. Do not wait for visible damage. A slightly dirty filter may still work, but a collapsed seal needs immediate attention. The easy assumption is that size solves everything. It does not. Type, airflow, sealing pressure, and filtration performance must work together. A clean installation also matters; dust on the housing edge can defeat a perfect filter.
Consider Engine Conditions and Operating Environment
How to Choose the Right Air Filter Size for Your Generator?
The correct air filter size depends on more than the filter’s length and width. Start with the generator’s engine requirements, airflow demand, and approved filter specifications. A filter that is too small may restrict air, increase fuel use, and raise engine temperature. A filter that is too large may seal poorly, allowing unfiltered air to enter. That can damage internal engine parts over time.
Consider the operating environment carefully. Dusty construction areas may require more frequent inspections than clean indoor spaces. Humid locations can encourage moisture buildup, while hot conditions may increase the engine’s workload. Oil mist, pollen, and fine sand also affect filter performance. Check the filter housing for gaps, crushed seals, or dust tracks. These details often reveal problems that measurements miss. It is easy to trust a perfect fit. That assumption can be wrong.
Tips: Measure the old filter only as a reference. Confirm airflow requirements in the engine manual. Inspect the housing before installation. Replace a damaged seal immediately. After fitting the filter, run the generator briefly and check for unusual noise, smoke, or unstable operation. Keep a service record, although many operators forget this simple step. Review the filter sooner after severe weather or extended high-load use.
Install and Verify the Replacement Air Filter
Choosing the right air filter size starts with the generator’s service manual, not a visual guess. Match the exact part number, outside dimensions, sealing surface, and airflow direction. A filter that looks close may leave a narrow gap around the gasket. Dust will find it.
Before installation, stop the engine and let the housing cool. Wipe loose dirt from the cover, but do not push debris into the intake tube. Check for cracked seals, bent clamps, or oil and water inside the housing. ISO 5011 testing evaluates air-cleaner restriction and dust-holding capacity, using measurements such as pressure drop in kilopascals and retained dust mass. These values explain why a “similar” filter may perform differently under load.
Install the replacement with clean hands. Seat the gasket evenly. Tighten clamps gradually, without crushing the element. Then inspect the intake path with a flashlight. Start the generator and listen for hissing, uneven running, or unusual black smoke. If the controller displays intake restriction, record the reading before and after replacement. A rising value under the same load can reveal a poor seal or an undersized filter. The U.S. Environmental Protection Agency’s engine-maintenance guidance emphasizes following the manufacturer’s maintenance schedule and inspection procedures. That sounds simple, but field checks are often rushed. I have seen a new filter installed correctly, while the old gasket remained stuck inside the housing. A final hand check would have caught it.
How to Choose the Right Air Filter Size for Your Generator?
Compare the replacement filter with the removed filter and the generator manual. Length, width, height, sealing surface, and retaining features must all match; air-filter dimensions are not universally standardized.
Installation check: confirm that the filter sits evenly in the housing, the gasket seals completely, the cover closes without force, and no unfiltered air can bypass the element. Never operate the generator without its air filter installed.
FAQS
Check the owner’s manual, service label, or maintenance record for the exact filter number. Record the engine model and filter dimensions together. Similar-looking filters may still restrict airflow.
Measure its length, width, and height with a rigid tape measure or caliper. Measure the filter body, not the flexible sealing edge. Write each measurement down immediately.
Yes. Measure the housing’s internal length, width, and depth. Check clips, ribs, hinges, and openings for interference. The filter should slide in without crushed pleats.
Inspect the gasket thickness and sealing position. Look for dust trails inside the housing. Cracks, bent clips, or flattened seals can cause leaks, even with correct dimensions.
Yes. Identify whether the filter uses foam, paper, or multiple layers. Confirm the approved filter type and airflow requirements in the engine manual. A size match alone is insufficient.
Dusty work areas need more frequent inspections than clean storage areas. Humidity, pollen, oil mist, and fine sand can reduce filter performance. Severe weather deserves an earlier check.
Switch off the generator and let the engine cool completely. Photograph the installed position before removal. Remove the filter gently, without shaking dust into the intake.
Pause the installation and verify the requirements with a qualified service professional. Do not force the filter into place. The cover should close evenly, without pressure or gaps.
Confirm that the airflow arrow points toward the engine. Run the generator briefly and listen for unusual noise. Watch for smoke or unstable operation. I would not trust appearance alone.
Conclusion
Choosing the correct air filter for your generator begins with identifying the engine’s specific filter requirements, including its shape, dimensions, airflow needs, and recommended filtration level. If the original filter is available, measure its length, width, height, sealing edges, and any mounting features. You should also measure the filter housing to confirm there is enough space for a secure fit. If you are asking, “what size air filter do i need for my generator,” compare these measurements with the generator’s service information rather than relying only on appearance.
A suitable replacement must match the required dimensions, filter type, and filtration rating. Consider where and how the generator operates, since dusty, humid, or high-use conditions may require a more durable or frequently replaced filter. During installation, clean the housing, position the filter correctly, and check that the seal is even with no gaps. Afterward, verify that the cover is secure and that the engine runs smoothly without unusual airflow or performance issues.

 Fisc Auto